This section is designed to help artists create assets to be used in 001 Game Creator. Below are some brief explanations of some of the terms used throughout this section:
Sprites – graphics that can be moved around the screen or otherwise manipulated as a singular entity. Characters, vehicles, effects, etc.
Sprite Sheet – a series of animation frames that have been combined into a larger image.
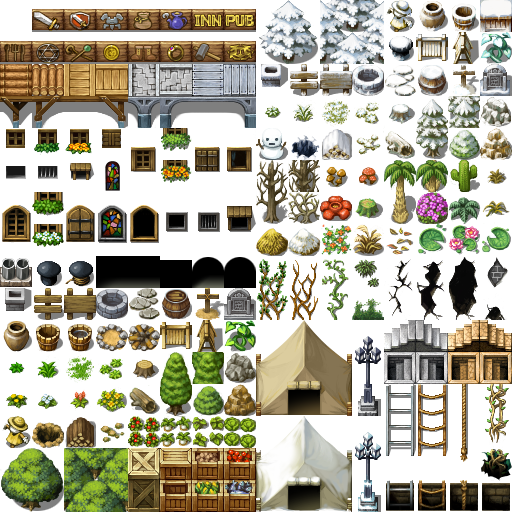
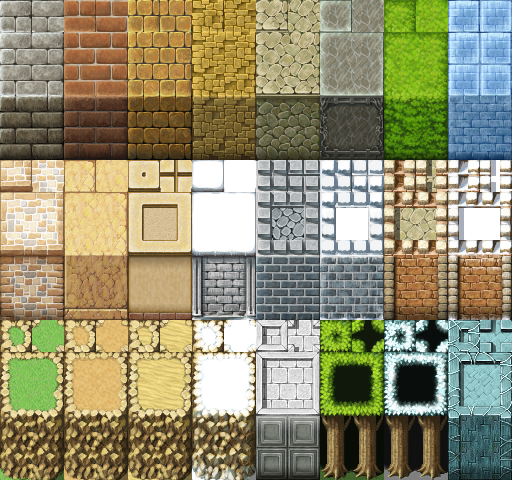
Tile-Sets – a collection of rectangular graphics or tiles that are then “painted” onto a Map. Terrain, walls/roofs, objects (such as furniture), etc.
Items – graphics that can be held, equipped or otherwise used by a player or NPC (Non-Playable Character). Weapons, tools, consumables, etc.
Supported File Formats
001 Game Creator supports the following graphic file formats:
-
PNG (transparency supported!)
-
JPG
-
JPEG
-
GIF
-
BMP
When using file formats that don’t support transparency, make sure you set the background color to Magenta (Red:255, Green:0, Blue:255, HTML#FF00FF) as 001 Game Creator will automatically interpret this color as transparency.
Resolution
001 Game Creator operates in multiples of 32 pixels (eg: 32×32, 64×32, 128×128, etc.) – It should be noted that this isn’t mandatory, as 001 Game Creator will still accept graphics with sizes that don’t follow this rule.
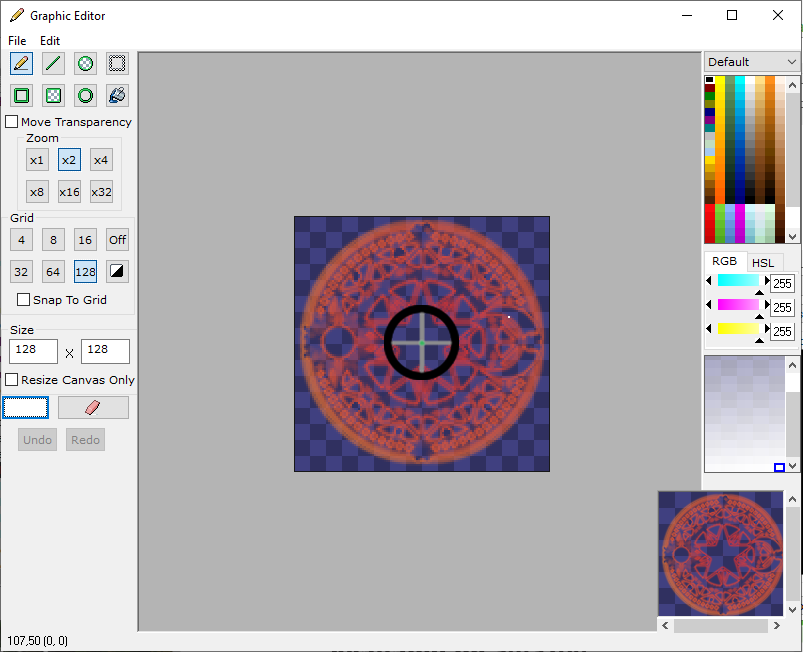
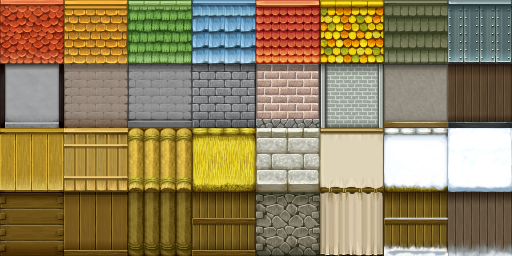
Tile-Sets are typically 256×256, with a singular tile being 32×32. Again, you don’t have to create graphics that follow this rule – though it is recommended. See image below for reference:
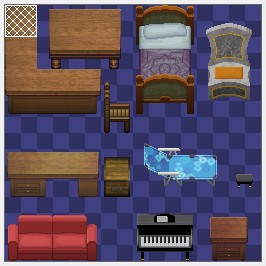
A 256×256 Tile-Set with various-sized pieces of furniture.
Utilizing Non-32×32 Art Assets
It is important to note that Tile-Set tiles are not limited to 32×32 pixels. When selecting an individual tile, you are able to import graphics that exceed these dimensions (eg: 64×64 pixels). This will ensure Tile-Sets remain crisp on higher resolution monitors and/or when the Change Zoom functionality is used.
Similarly, tiles below the standard 32×32 dimensions could also be used without issue, whether it is to maintain a consistent overall look if the game is played when utilizing the Change Zoom event (eg: using 16×16 tiles with a 0.5 camera zoom) or to intentionally give it a more old-school look.
For Lower/Upper Objects, users can make use of the “Scale” box to resize HD Tile-Sets appropriately. For example: if you import a 64×64 tile, setting the Scale to 50% will cause the tile to display as a 32×32 pixel tile on Maps – with the added pixel density, creating a higher resolution tile. The same principle applies respectively for tiles less than 32×32 pixels (eg: importing a 16×16 tile and setting the Scale to 200% will cause it to display as a 32×32 pixel tile on Maps).
It should also be noted that a tile’s dimensions do not necessarily have to fit the NxN form. A 16×48 tile for example would still be acceptable, although less recommended for Ground tiles and more ideal for Lower/Upper Objects such as trees, tall rocks etc.
Terraformation
Terraformation tiles are broken up into 16×16 portions in order to properly handle different combinations. Each square inside the Terraformation window is also a separate graphic, so keep this in mind when you create them. See images below for reference:
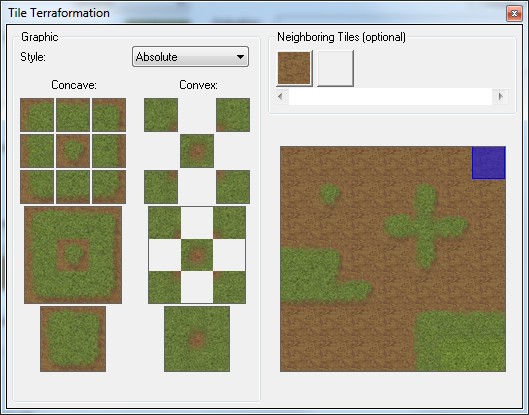
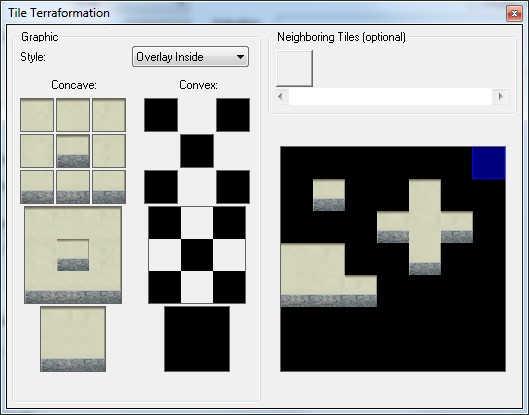
Ground/Wall tiles are 32×32. Each square in a Ground/Wall Terraformation is a separate graphic.
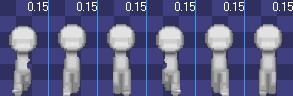
Grayscaling
When creating Sprites it is recommended that you grayscale them, as color can be applied directly in 001 Game Creator itself – allowing for greater customisation of your Sprites. See image below for reference:
Layers
Animation
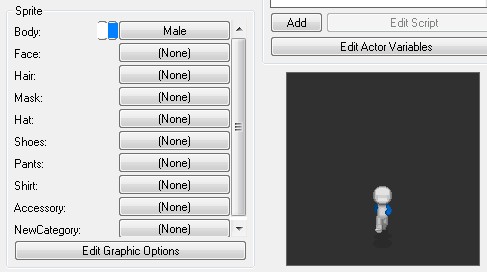
The “Male” Sprite (seen above) consists of a head, torso and legs but the arms appear to be missing? The arms are actually split into a separate animation layer which is important because it allows the user to specify whether it should appear in front of or behind the previous layer (naturally we want the arms to appear in front of the body and not behind it).
Other features (like eyes, clothing, etc.) are created as separate Sprites entirely and, similar to the animation layers themselves, can be rendered in front of or behind previous layers. See image below for reference:
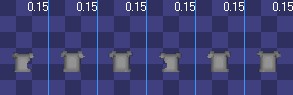
A separate “Shirt” Sprite that can then be stacked on top of the “Male” Sprite. Once again, it is important to grayscale the graphic so that color can be applied directly in 001 Game Creator itself. This also allows for any number of configurations, whilst in the editor, as individual pieces can be swapped out for others.
If using photoshop there is a very useful script feature to easily export each layer separately. Under the File menu option, navigate to Scripts. From there you should see an option titled Export Layers to Files. In the next context menu you will have options to trim exported layers of transparency, set the exported file format, only export visible layers, and set a prefix to exported files among multiple other options.
Bones/Joint Animation
001 Game Creator also supports animation by way of manipulating the position and rotation (size and color/opacity too, for that matter) of multiple individual parts of a Sprite between key frames (including an interpolation feature which allows for smoother transitions from one frame to the next), thus, animating entire sheets with actions of a character does not become a necessity on the artist’s part.
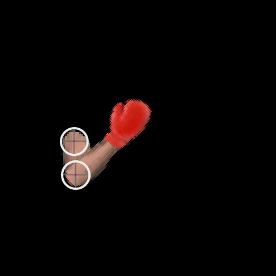
The point of rotation of a bone is located in the center of the image, so to make a bone more easily manipulable/rotatable, the bone’s joint must be centered in the image file. See image below for reference:
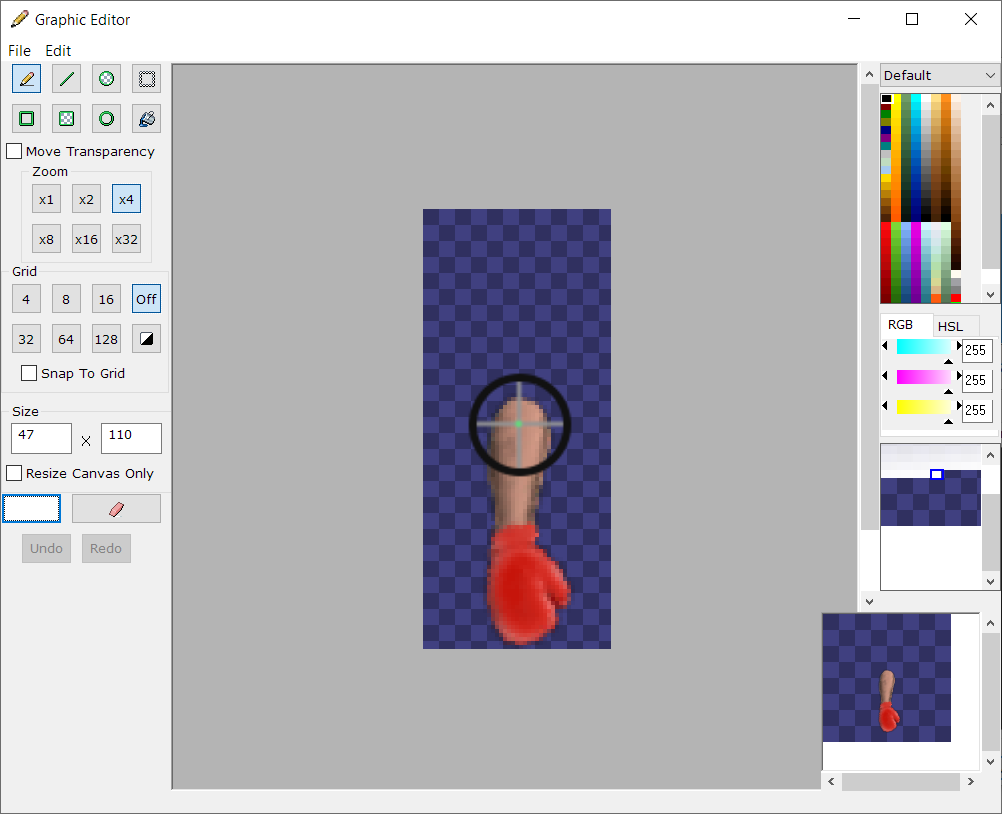
The lower arm limb that is part of a Sprite comprising a whole arm. Notice how its edge is centered on the canvas.
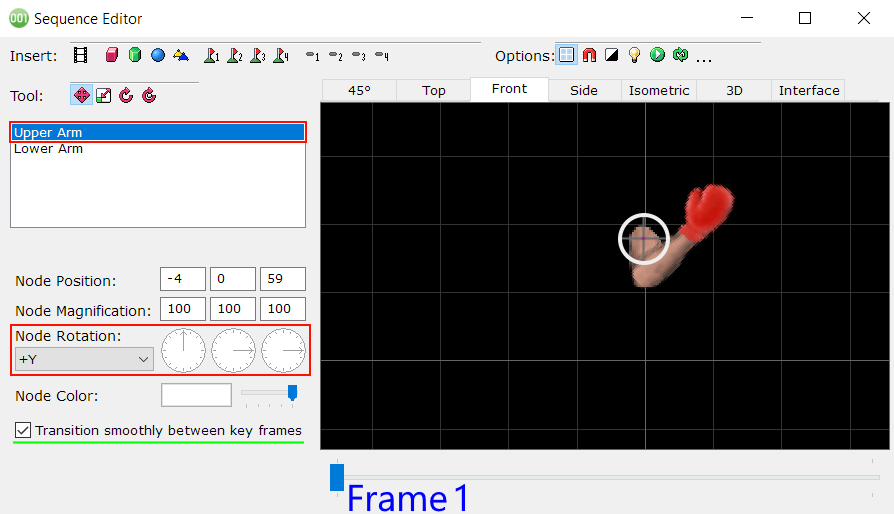
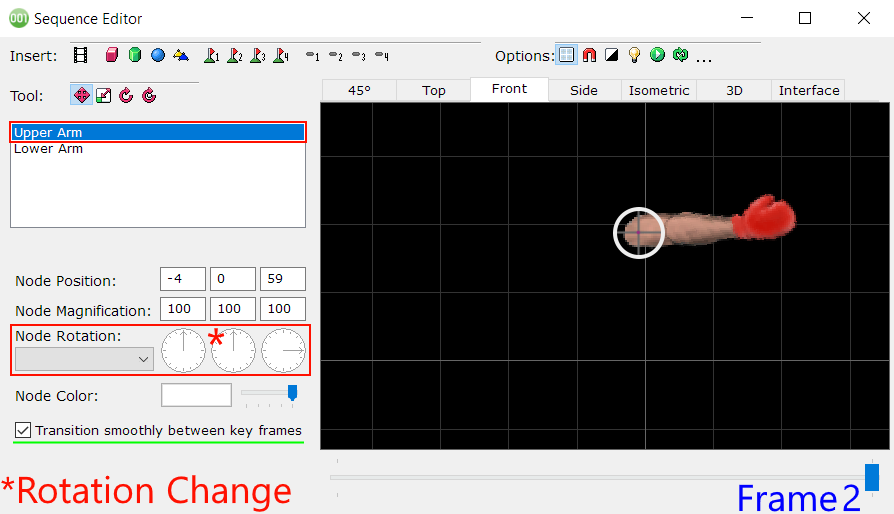
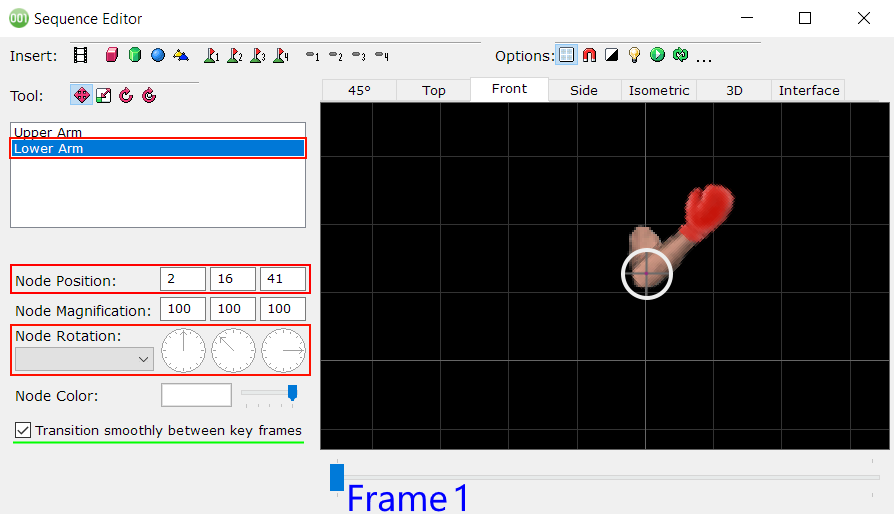
Using that image along with the upper arm part we can sequence them like this:
Upper Arm:
Lower Arm:
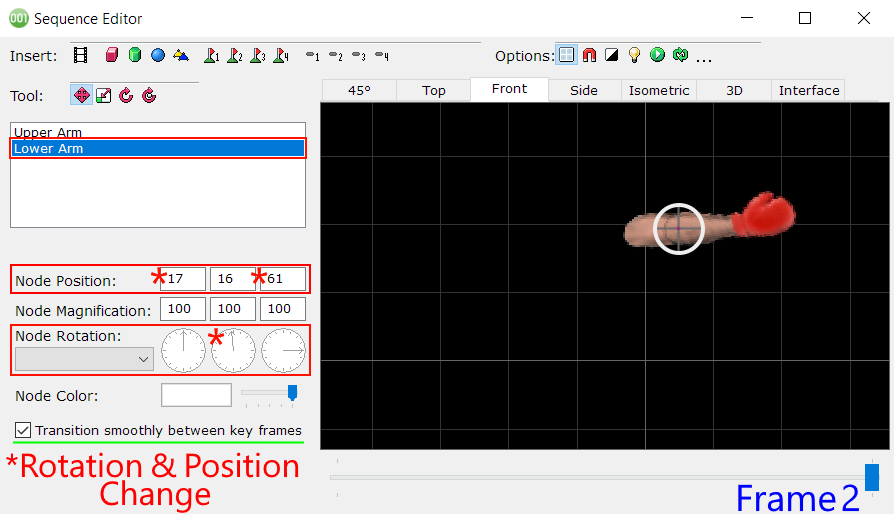
Combining both the upper and lower arm keyframes together will result in a smooth animation where the software will interpolate frames.
NOTE: If “Transition smoothly between keyframes” was unchecked, then the arm would simply snap back and forth instantly between keyframes.
Rotation using a graphic when the bone utilizes the entire canvas (or is not properly centered) is still possible; however to achieve the above results, the developer will also have to alter its position in addition to its rotation for all frames in order to keep it in one place as it’s rotating (in the above example, altering the lower arm’s position as well was necessary because it is a child bone while the the upper arm is a parent bone).
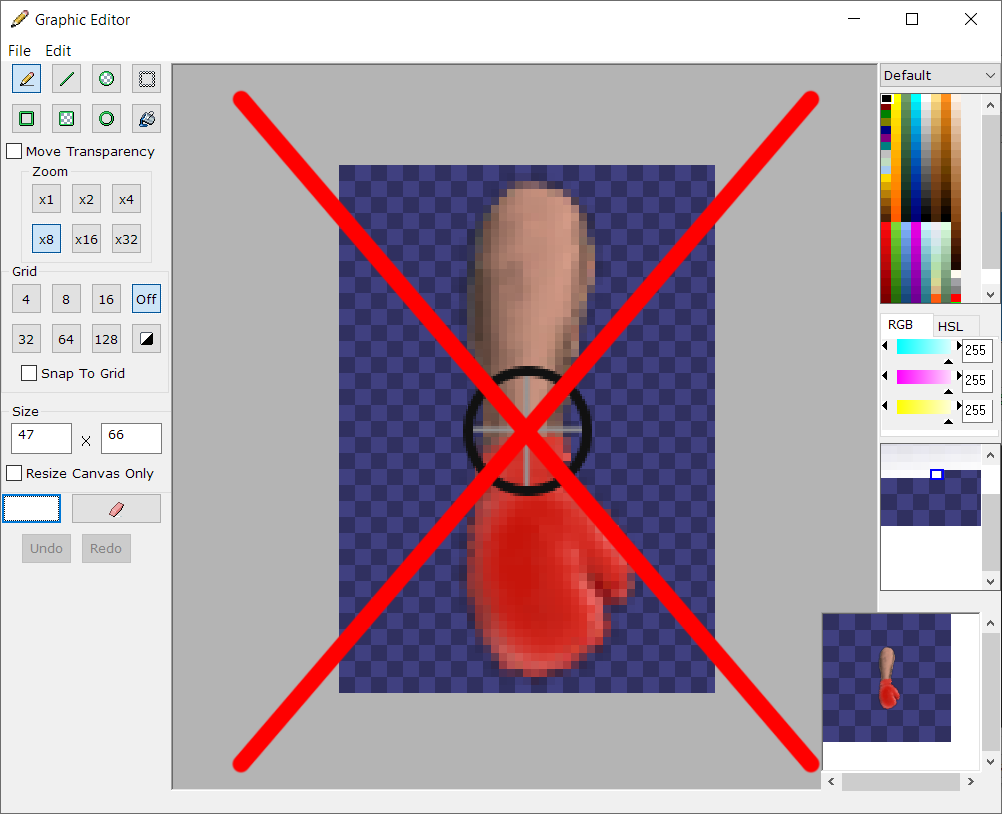
The same image of an arm as shown above, except this one takes up the entire canvas, meaning its pivot point is now mid forearm as also indicated by the crosshair. In this scenario, the arm will spin around the pivot point instead of rotating from the joint.This approach is not recommended for animating something of that nature but would be ideal for things such as symmetrical effect graphics.
Render
001 Game Creator allows users to set a render priority (or layer order) of individual animation layers within a Sprite. Though this might seem somewhat irrelevant when creating your graphics (as this is a 001 Game Creator feature) it might be useful to keep this in mind as a reminder to split your graphics into multiple layers so that they’re more useful to 001 Game Creator users (referencing back to the “Male” and “Shirt” Sprites).
Color
Another good reason to create graphics with multiple animation layers is the color renderer (a 001 Game Creator feature) that allows users to specify unique colors for each individual animation layer within a singular Sprite. Using the “Male” Sprite as an example once again; because the arms are on a separate animation layer the user is able to specify an alternative color that only affects that animation layer and not the others. See image below for reference:
Animation 1 (the body) is white, whereas Animation 2 (the arms) are blue.
Holding Points
A holding point is a specified location on a Sprite where an Item graphic will appear, if selected. When creating Item graphics, make sure that the “handle” part (or the part you wish to be held) is in the centre of the image so that it is displayed properly when equipped. See image below for reference:
For more technical information regarding Holding Points click here.
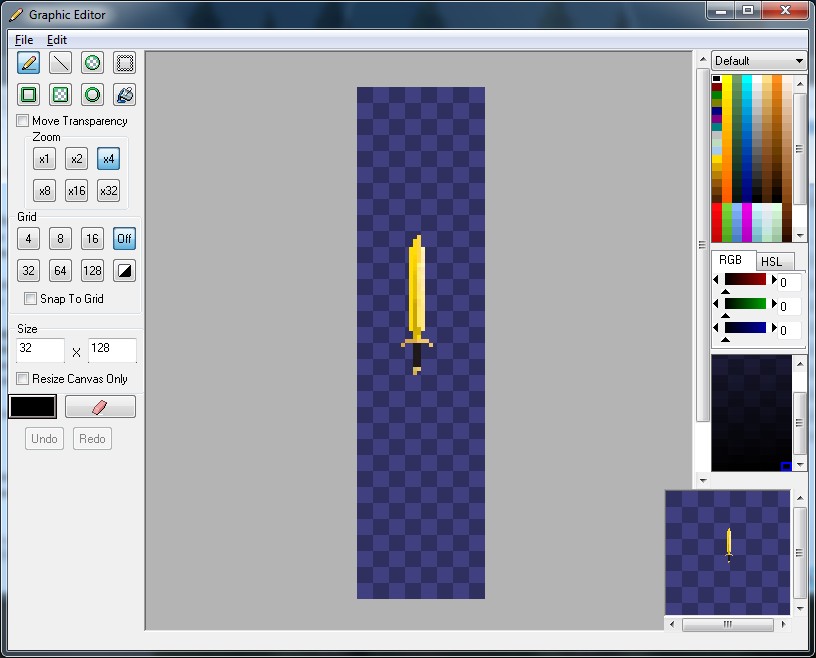
An “Energy Sword” Item. Notice how the handle is centred in the image? This will be the part of the graphic that is held, when a Holding Point is added to a Sprite.
Result
When you combine everything discussed above, you’ll get something that looks like this:
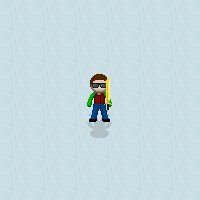
“Male” Sprite with a light complexion, green arms and a full outfit of clothing (that are each individual Sprites) including hair, sunglasses, a vest, pants and shoes. Whilst also holding an “Energy Sword” Item.
Mass Importing
Learn how to import these resources by clicking here.
001 Game Creator allows you to directly import Tile-Sets and Sprite sheets for efficient batch importing of assets. Please ensure that file names comply with the required format for proper recognition within 001 Game Creator, (“_A1.png”, etc.) in order for 001 Game Creator to properly recognize them. See images below for reference:
Actors are 96×128 split up into 4 rows for each animation direction (96×32 for each row)
Ground Terraformations are 128×96 (smaller terraformations are 64×96)
Roof/Wall Tiles are 64×64
Lower Objects vary from 32×32, 32×64, 64×64, 96×96, etc.
Wall/Cliff Terraformations are 64×160
Ground Tiles are 32×32
