The Point & Click Adventure Kit is available on Steam as optional DLC. This page explains some of the core functionality present inside this template.
Adding Custom Images (Map Sprites)
To create a custom Map image you first need to create a new Sprite. Once you have a new Sprite you’ll need to determine what the orientation of the Sprite is.
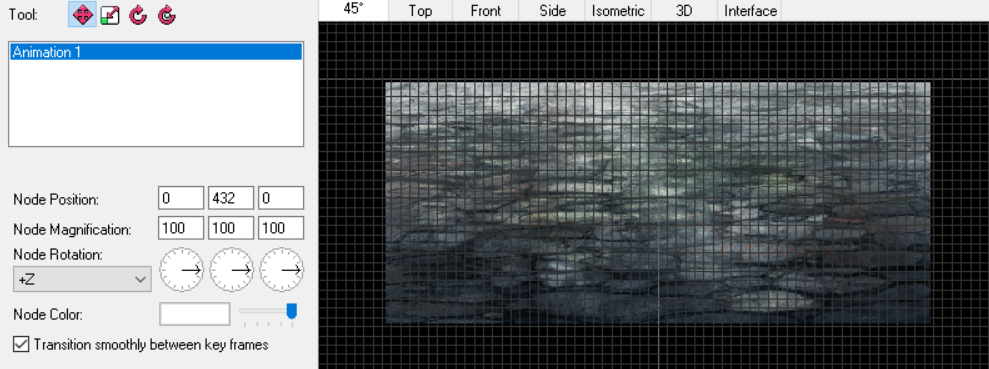
For flat Sprites that the player walk on top of you will want to make the following adjustments:
-
Enable the “Disable Depth” option
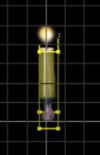
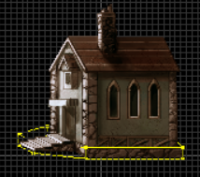
For a tall Sprite that the Actor can walk behind you can use the default sequencer position and orientation, however you will want to make sure to set up a collision that fits the Sprite so the player is unable to walk through the object. It is recommended to use a “Rectangle Collision” whenever possible, however for complicated objects you can use the “Polygon Collision” instead.
Template Types
In the Point & Click template there are 3 different types of Actor Templates available to be used by default.
Player – This Actor Template is used for the main player and should not need to be modified, you should instead edit the Actor in the Players and Party Members window.
Environment (Static) – This is the Actor Template you will be using for the bulk of your mapping. These are any scenery pieces from collectables, particles, background objects, etc.
Actor (Auto Scale) – This Actor Template is used for any Actors that typically move within your scene along the Y axis. Any Actor belonging to this template will behave similar to the “Environment (Static)” type, however when the Actor moves along the Y axis the movement speed and size of the Actor will scale in the same fashion as the main player.
Creating A Map Scene
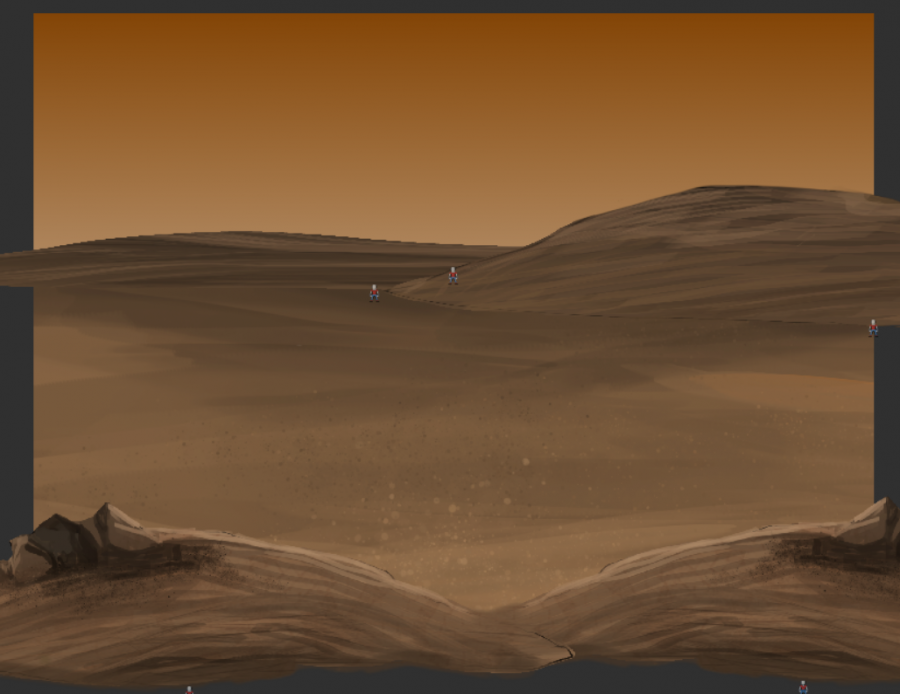
A Map scene is made up of a bunch of environment Actors which the main player moves and interacts with. A good starting point is selecting a ground tile to work with. In this example we are going to create a basic desert scene. You will want to make sure your Map is in the “45 degree” orientation.
Setting The Background
First we are going to give the Map a nice gradient background by setting the background color inside the Map Environment window.
Next we are going to place the main ground layer. Using the Actor tool, click anywhere on the Map and create an “Environment (Static)” Actor and select your ground Sprite. Then using the Pointer tool (Set to “Move on Axis”) move the ground until it fits your Map. You can also use the scale option for the Pointer tool to resize your Sprite if needed.
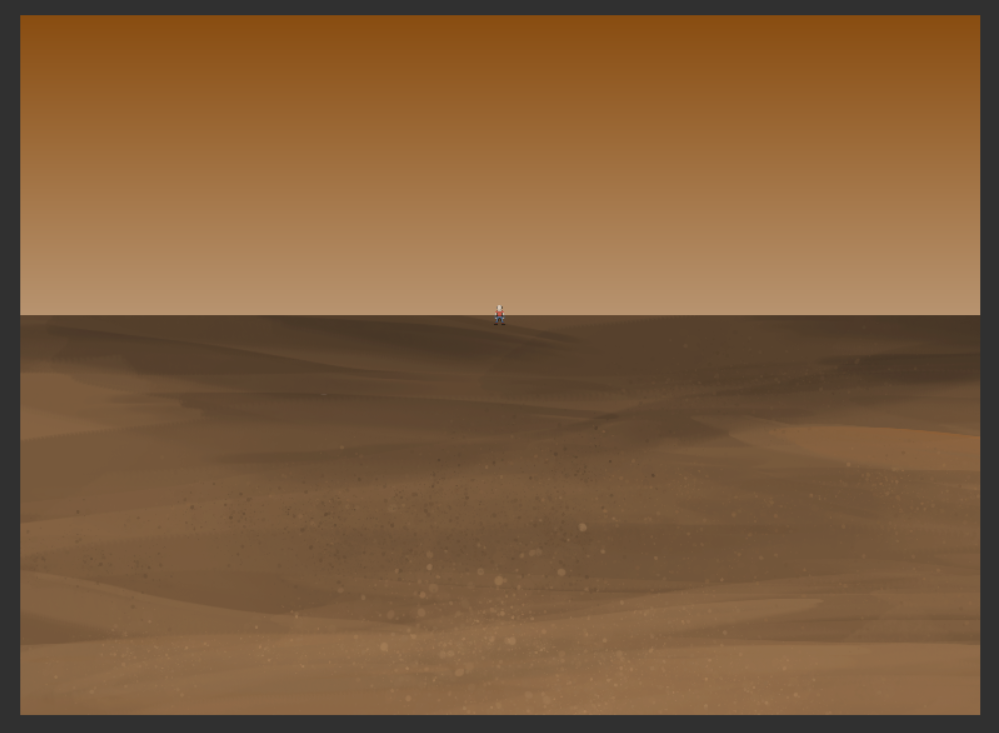
Repeating this exact same process I have placed a few dunes on the Map to add a background and a foreground. Don’t worry about going outside of the Map as these will be cropped out as long as you have the “Letterboxing” enabled. See “Enable/Disable Letterboxing” Custom Event. You can move the Sprite outside the bounds of the Map by selecting the specific “Move X”, “Move Y” and “Move Z” Pointer tool options.
Tip: You can disable the “Snap to Grid” mapping option to make positioning easier when fine-tuning things.
Layering Objects
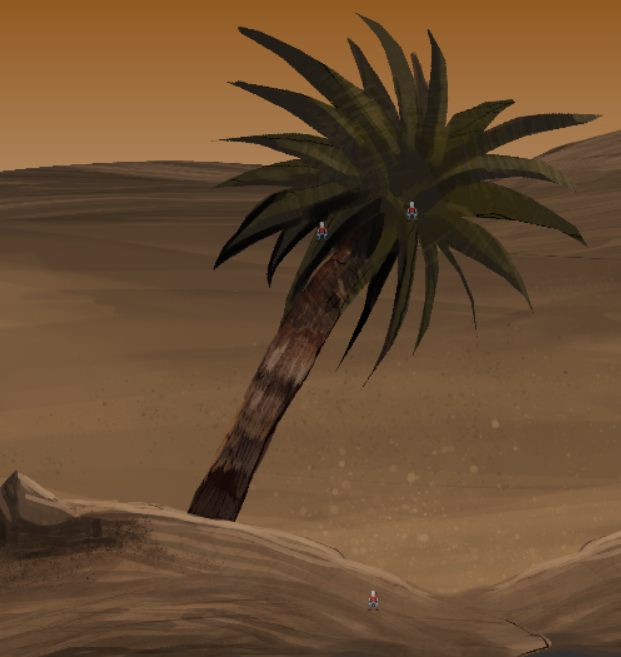
You will notice that sometimes when placing objects you are unable to get things to layer correctly. Layering is determined by Y position and Sprite orientation. You are still working in a 3D space even if it is a 2D game. Care must also be taken if you are wanting to properly light your scenes using 001’s Dynamic Lighting System. Even if two objects appear close together they may be far apart.
In this example I am going to try placing a palm tree in the foreground dune. First place the palm tree close to where you want it to be:
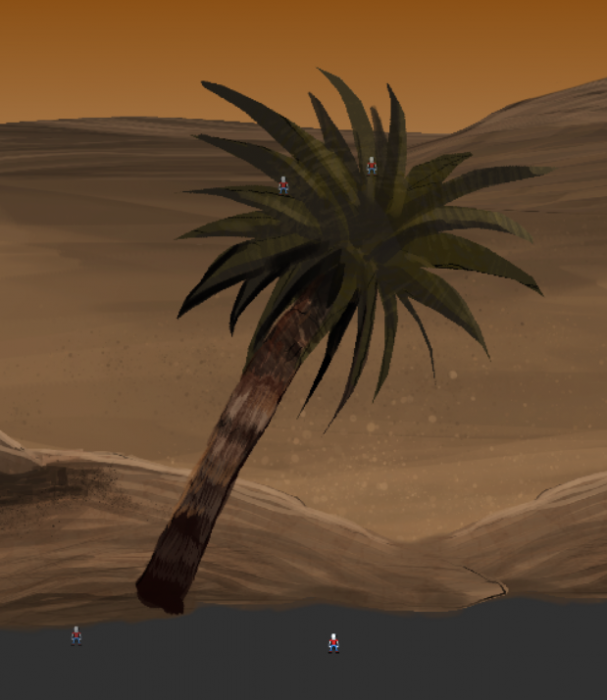
Now using the Pointer tool set to “Move Y”. I will move the tree down until it pops in front of the dune:
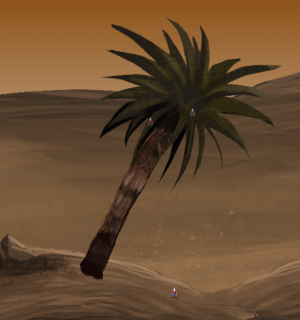
Then using the Pointer tool set to “Move Z”. I will bring the tree up the dune.
Interacting With The Map
If you are using the default Actor Templates, creating Actor interactions is very simple. All Actors come pre-loaded with a full set of triggers for each of the various mouse interactions.
To create a basic “Look” interaction you can modify the Mouse Down (“Look Cursor”) trigger. Simply open up the “Message Box” event inside and delete the existing text. You can then type whatever message you want and save the script. When the player clicks on that Actor, with the “Look” interaction, your message will be displayed.
Using Item on Actor
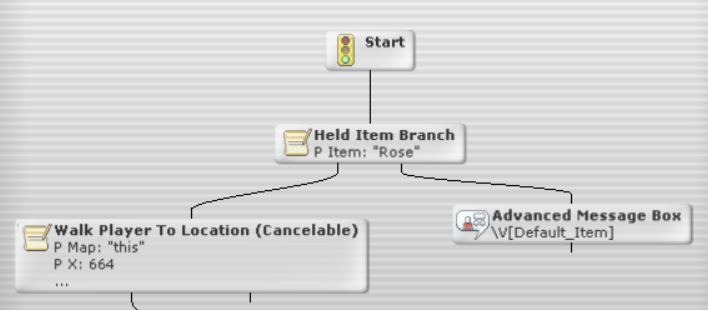
To allow using an Item on an Actor you have to modify that Actors Mouse Down (“Item Cursor”) trigger. Inside the Script Editor you will want to use the “Held Item Branch” Custom Event that is included with the template. This branch will take the left side if the Item is currently selected. Your script should look something like this, where the left side is what happens if the correct Item is used:
Combining Items
Combining Items requires that you edit the “Source/Used” trigger for that Item (inside the Items and Magic window).
You will want to edit the “Combine Item with Item” sub-script. (If this script is not located inside your Item’s “Source/Used” trigger please refer to section “Adding Custom Items”)
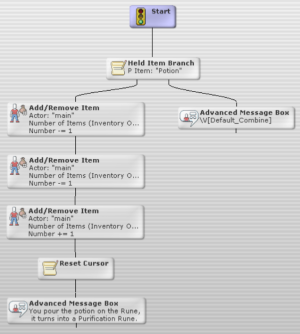
A basic script script should contain a “Held Item Branch” to determine if the combination is acceptable, followed by some add/remove Item events to remove the “Fuel” Items and be replaced with the “Crafted” Item, as well as a reset cursor event to remove the Item from the cursor and a Message Box to show that the combination was a success. Your script should look something like this:
Please note: You will need to repeat this script on your second Item if you want the combination to work both ways.
Adding Custom Items
It is highly recommended that you copy & paste an existing Item that comes with the template to ensure it is set up properly. You can do this by selecting any default Item and clicking the “Copy” button, followed by the “Paste” button.
You can then change the “Display Name”, “Description” and any other options you want. You can edit the Sprite by either replacing or editing the graphic.
Scripting Interactions
When scripting for if the player uses an Item on themselves, see the “Source / Used” trigger. Default responses for each player state (Walk, Use, Talk, Look, Eat and Item) have already been set up and are fully changeable.
To determine which Items are used for “Combination”, refer to the same trigger. The base Item is “This” and the second Item is located in the “Held_Item” Global Variable. Use the “Held Item Branch” event to check the Items.
Input Sets
Unlike other templates, the Point & Click Adventure Kit relies solely on mouse inputs.
Cursor
| Key | Method | Description |
|---|---|---|
| LMB | Pressed | Moves the player to current mouse position and sets current magnification of player. |
| LMB | Released | Runs the mouse up trigger. |
| RMB | Pressed | Sets the current highlighted Item as active (useable). |
Custom Events
Change Map
Moves the player to a new Map with fading options.
-
P_Map – The Map in which you want the player to move to.
-
Position – The coordinates to move the player to a chosen Map.
-
P_Direction – The facing direction of the moved player.
-
P_Fade_Color – The color of the transition fade out.
-
P_Fade_Out_Time – Duration it takes to fade to your chosen color.
-
P_Fade_Delay – Duration between fading in and out.
-
P_Fade_In_Time – Duration it takes to fade back in to normal view.
Enable/Disable Letterboxing
Enables/Disables the letterboxing feature.
Held Item Branch
Takes the left branch if the selected Item is on the cursor, or the right branch if it’s not.
-
P_Item – The Item currently held by the player.
Lock Camera Zoom
Locks the camera to ensure the Map always fits inside the game window.
-
P_State – Determines whether the camera is locked or unlocked.
-
P_Fit_Width – Determines whether the width of a Map is forced into camera view.
-
P_Fit_Height – Determines whether the height of a Map is forced into camera view.
Set Cursor for Change Map
Changes the cursor Sprite to show clicking in this specific area will change Maps. Only changes cursor if the user selected the “Walk” state first.
Set Vanishing Point
Changes the current vanishing point.
-
P_Vanishing_Point_Y – Determines the current Y vanishing point coordinate.
-
P_Magnification_Modifier – Determines the projected distance of a vanishing point in correlation to Actor scale.
Start/Stop Cutscene
Shows/hides the HUD, and removes the current cursor until the cutscene is completed. When re-enabled, the cursor is reset back to the default cursor.
Walk Player to Cursor (Cancelable)
Walks the player to the cursor, but right clicking will cancel the walk. Takes the left branch if the walk was successful or the right branch if it was cancelled.
Walk Player to Location (Cancelable)
Walks the player to the selected location, but right clicking will cancel the walk. Takes the left branch if the walk was successful or the right branch if it is cancelled.
Reset Cursor
Resets the cursor Sprite and behavior to the default walk cursor and behavior and removes any held Items.
Variable Definitions
Global Variables
| Name | Description |
|---|---|
| Vanishing_Point_Y | Used to scale Actors. The Y position where the Actor’s size becomes 0 |
| Magnification_Modifier | Used to scale Actors. The Actor’s size is multiplied by this amount when at the bottom of the screen. |
| Held_Item | Sets which Item the player has selected. |
| Change_Map_Direction | Sets which direction the “Move Map” cursor faces. |
| Default_Eat | Sets the default response for “Eating” interaction. |
| Default_Look | Sets the default response for “Looking” interaction. |
| Default_Use | Sets the default response for “Using” interaction. |
| Default_Talk | Sets the default response for “Talking” interaction. |
| Default_Item | Sets the default response for “Item” interaction. |
| Default_Combine | Sets the default response for “Combination” interaction. |
| Default_Item_Walk | Sets the default response for “Item Walking” interaction. |
Actor Variables
| Name | Description |
|---|---|
| Enable_Autoscale | Turns autoscaling on or off. |
| Base_Magnification_X / Y / Z | Holds the “Base” magnification for an Actor, used for auto scaling. You need to re-set these values if you manually want to change the magnification via scripting. |
| Base_Speed | Holds the “Base” speed for an Actor, used for auto scaling. You need to re-set this value if you manually want to change the speed via scripting. |
Switches
| Name | Description |
|---|---|
| Lock_Camera_Zoom_X & Lock_Camera_Zoom_Y | Determines if the X size and Y sizes of the displayed Map are locked to the window. |
| Doing_Action | Used internally to check if the player is performing an action, like moving. |