Applying Material Properties to 2D Surfaces
In 001 Game Creator, you can enhance the look of 2D Sprites and Tiles projected in a 3D plane by applying various material properties. These options are accessible through the “Edit Material” menu found in both Sprites and Tiles, allowing you to edit their ambient and diffuse colors, as well as set up specular highlights and glows to create more visually appealing 2D objects in a 3D environment.
Normal mapping can also be applied to 2D surfaces projected in 3D space. This technique simulates surface details and texture depth without sacrificing performance. By setting up a normal map for a 2D object, you can make it interact with light sources as if it had real depth and texture, enhancing its visual complexity and realism.
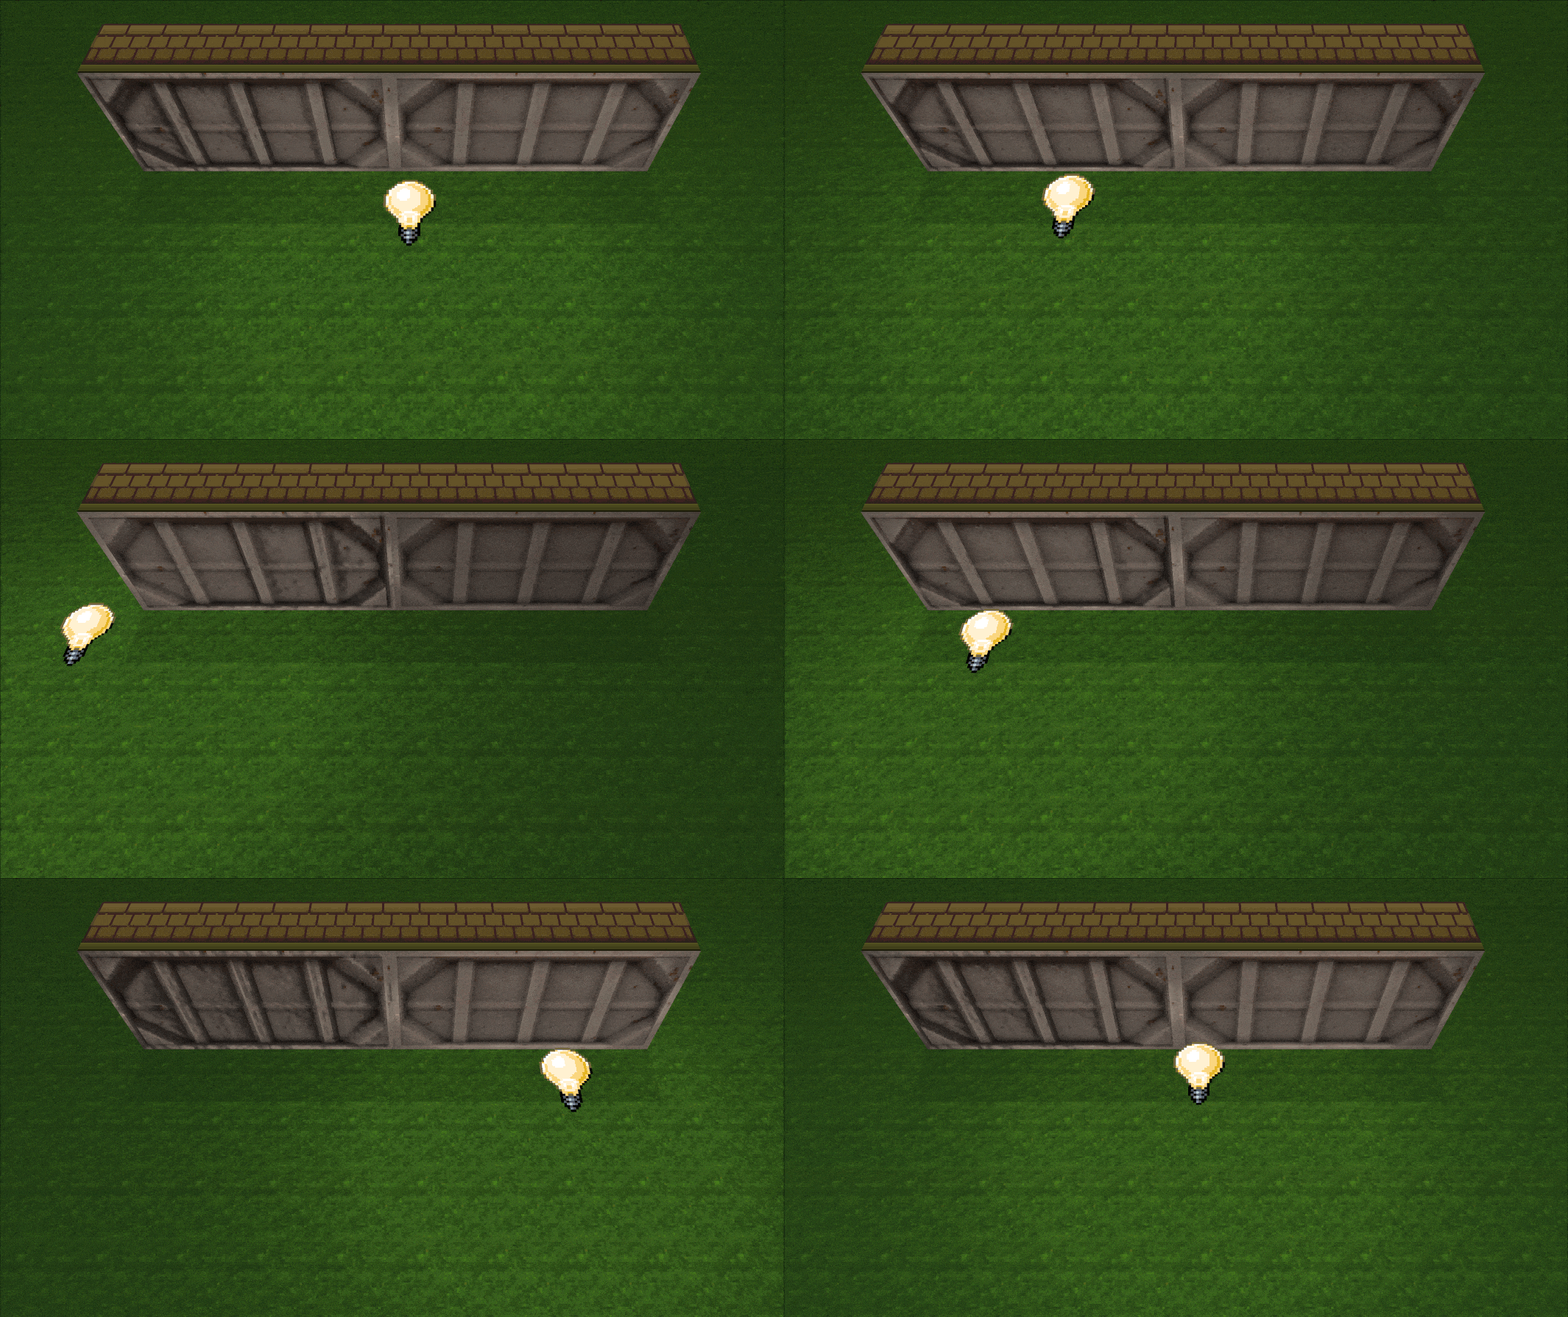
Below you can see the difference lighting makes on a wall tile utilizing a normal map, versus one without.
Recommended 3D Applications
Below is a list of recommended 3D applications for creating 3D assets for use in 001 Game Creator:
Blender
-
License: Free
-
Bone Based Animation Support: Yes
-
Scale: 1 Blender Unit (Within the dimensions portion) = 1 pixel within 001.
Example – A cube in blender with the dimensions 32x32x32, will equal a 32x32x32 cube in 001.
(Scale refers to the dimensions of your object, since the Scale can be set in Blender to any unit value it is best to disregard it until you better understand Blender.)
Specular Components – while using Blender and exporting via the DAE exporter, it should be noted that a specular component of 0 will automatically default to 40.
“Why is my model so much darker in 001?”
Blender has a material settings panel that can change the diffuse color of a model, which affects the texture. Setting the diffuse Intensity value to 1 in this right side dash Material Panel fixes this issue.
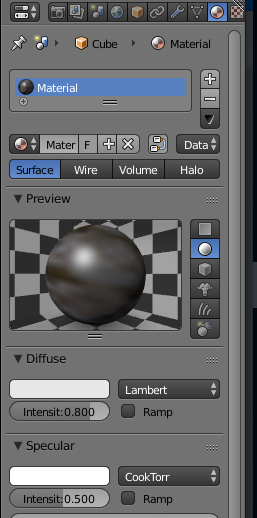
“How do I export an animated model from Blender so that I can import it into 001 Game Creator?”
The easiest solution would be to select the armature and then export it as a COLLADA (.dae) file (see image below for export settings):
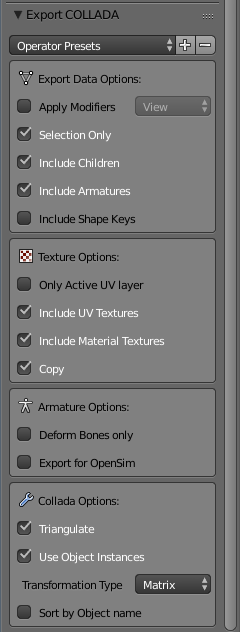
Please note that the “Copy” option (bottom of second panel) should only be selected the first time you export, otherwise it can cause the texture to no longer display on the model. Blender also has issues importing COLLADA files so it’s recommended that you save your model as a .blend file before exporting so that you can easily modify your model later on if needed.
Also the Apply Modifiers can be checked if you have any modifiers like Mirror or Subsurface Division in your mesh and you want the final model to have them.
Wings3D
-
License: Free
-
Bone Based Animation Support: No
-
Scale: Unknown
Milkshape
-
License: Free
-
Bone Based Animation Support: Yes
-
Scale: Unknown
3DS Max Studio
-
License: Paid
-
Bone Based Animation Support: Yes
-
Scale: Unknown
Sketchup Make
-
License: Free for non-commercal use
-
Bone Based Animation Support: No
-
Scale: 105′ = 32 pixles
-
Export Format: .dae
Supported File Types
The following file types are supported for static models in 001 Game Creator:
-
.dae
-
.blend
-
.obj
-
.x
The following file types are supported for 3D animations in 001 Game Creator:
-
.dae
-
.x
Rendering Method
001 Game Creator uses OpenGL for rendering 3D models. Minimum specifications are cards supporting OpenGL 2.1. Recommended specs are cards supporting OpenGL 3.0 and above.
Materials and Textures Support
001 supports simple GLSL diffuse materials. Reflectivity, emission, translucency and shadow maps are not implemented in engine. Normal maps are supported.
Mesh/Normal Rendering
Smooth Shading – supported, toggled within your renderer/editor. 001 does not have any options to enable this within the engine.
Flat/Mesh Shading – supported, this is the default rendering method for editors.
Import 3D Models
Importing 3D Models into the Sprites editor works similarly to regular Sprites. Click on the “Add Animation” button to the right, then click on the plus (+) symbol and instead of selecting “Images Files” for regular 2D Sprites, select “3D Model” from the drop down menu instead.
3D Master Models
Master Models are a single instance of all meshes, materials, textures and animations from a supported file type (.dae, .fbx, .x, etc.) They are used as a source file for all data needed to render into a scene without the need for multiple 3d Models set per pose.
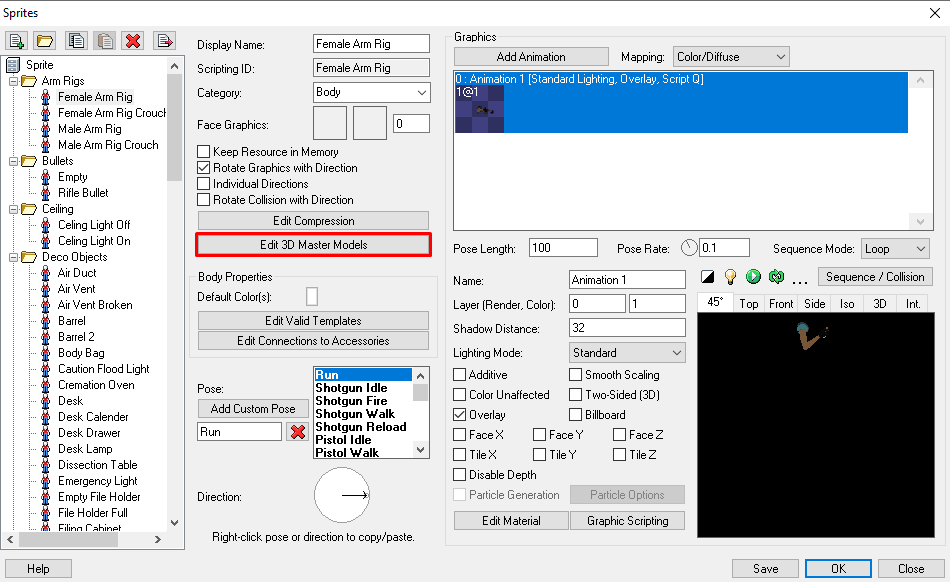
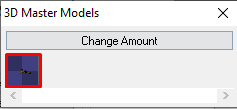
To utilize Master Models in your project, click the “Edit 3D Master Model” button. Then after the new window opens, define the amount of models required for the Master Model using “Change Amount” and set it to your desired amount of Master Models you wish to provide for your sprite. Just like the Add Animation section, clicking on the empty box and opening your desired model file will import your model into the empty frame ready to be used by Master Segments.
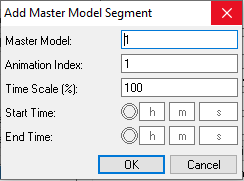
Master Segments are a timestamp taken directly from the Master Model’s animation timeline, that was created in your external rendering/modelling program of choice. To add a Master Segment to your desired pose, select your desired Pose. (ex. Idle) Click “Add Animation” and select “Master Segment…” from the drop down menu.
- Master Model – the slot your desired 3d Model is set to in the Master Model section.
- Animation Index – the index of the timeline you are pulling your key frames from.
- Time Scale – the speed at which your animation plays. (100% by default, 200% would be 2x animation speed)
- Start Time – denotes the exact start of your desired animation.
- End Time – denotes the end of the animation.
TIP: The easiest way to get an approximate time for desired frames is to multiply your target frame by 0.033 to get the total in seconds the frame is located within your animation timeline. (FRAME#x0.33=FRAME TIME)
Master Models and Master Segments are best used to reduce the amount of animated model instances in your projects. Compared to inserting a 3D Model in the animation composite (which use a separate model instance per pose), Master Segments only render based on the single Master Model instance.
Master Segments
When the “Master 3D Model” option is filled, “Master Segment” will be enabled in the animation list underneath “3D Model”. Master segments allow you to reference a track and sequence time.
Time Scale of Master Segments – 30 frames per second or 0.033 per frame within the Add Master Segment of 001
Texture Mapping
Color/Diffuse Mapping – is the base texture of the 3D model.
Normal Mapping (Optional) – is an optional texture used to add higher detail to the 3D model. Most commonly used to reduce the need of high poly models (thus conserving resources). With the introduction of 3D, Tile-Sets now support normal mapping.
UV Mapping – 001 supports UV Mapping for both animated and static 3D models. UV Mapping is a way of mapping a 3D model in which you map each part of the 3D model into a picture, and this picture will be used as the texture for model.
Blender
Blender 2.8X and Above
Blender 2.8 and future version have introduced some minor changes to the workflow compared to older versions of Blender. The steps required for a proper export for 001 are essentially the same execution, but locations have changed in newer Blender versions which are outlined below. For those unfamiliar with the 2.7 workflow you can view our breakdown here or scroll down to the next section.
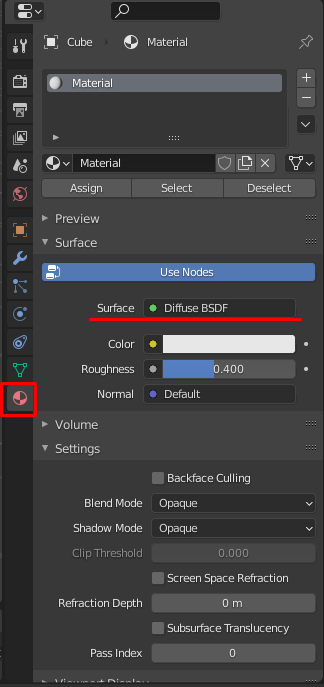
- Setting Material to Diffuse – This is required for your model to render properly. Other material shaders are not supported, causing models to break within 001. In Blender 2.8, new rendering methods were added by default installation.
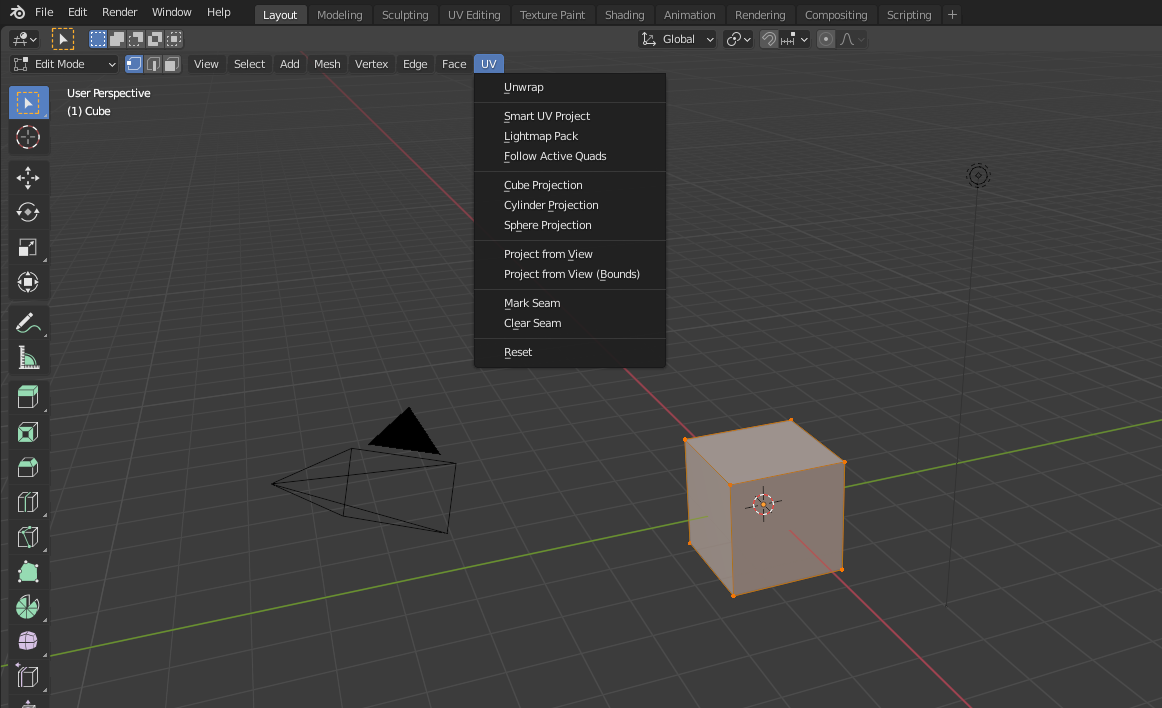
- Marking seams and unwrapping. – Instead of being located in the bottom dashboard options (default blender install 2.7) these option have moved to the top of your preview frame context window.
- Viewing UV unwraps – All views have been separated from the dropdown menu in the bottom left. Views are now separated by name instead of image.
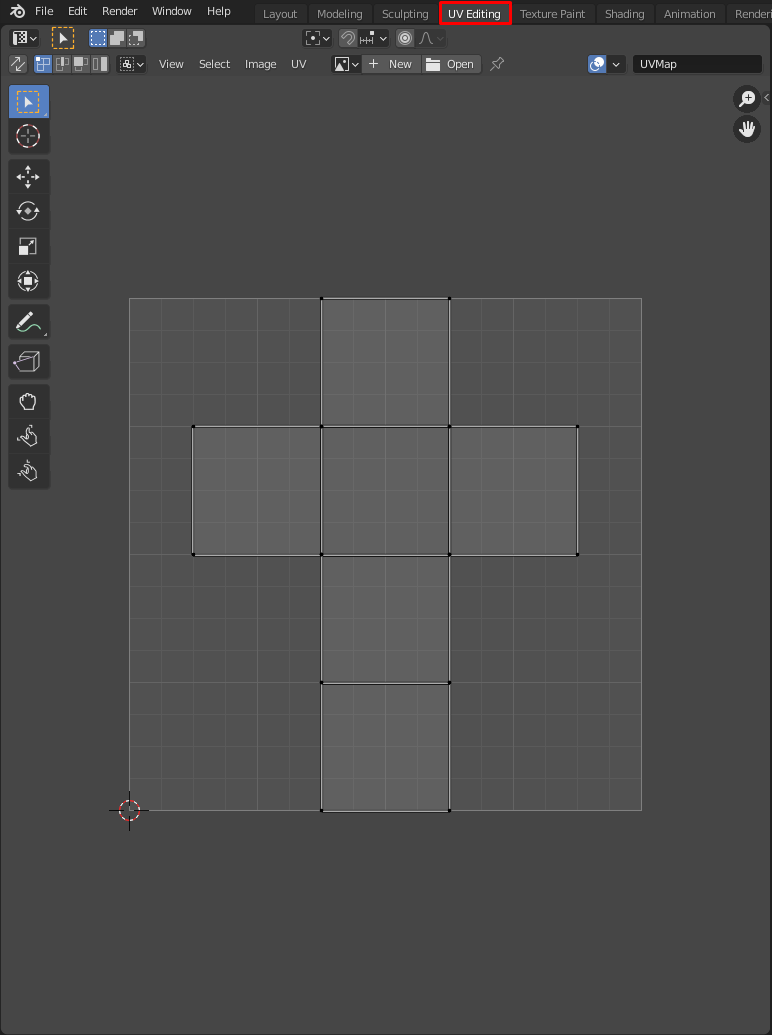
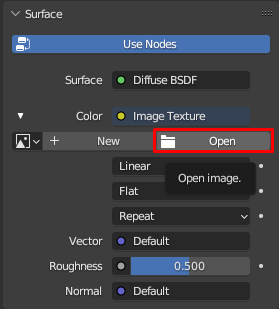
- Set a texture image using your UV mapping, with the Material workspace dashboard.
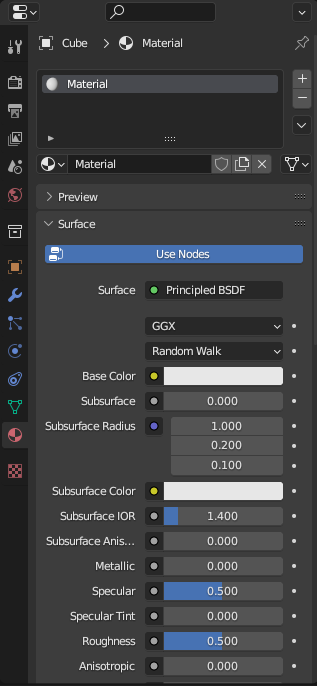
- Make sure your material surface is set to Diffuse BSDF for optimal rendering within 001 Game Creator.
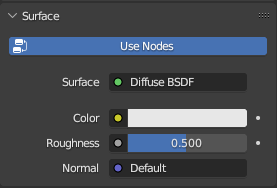
Click on the color input dot and change it to Image Texture
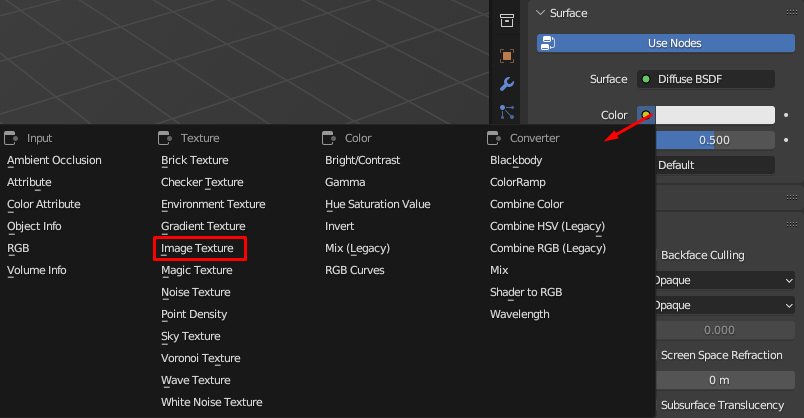
Finally, load your texture image created for your UVMap
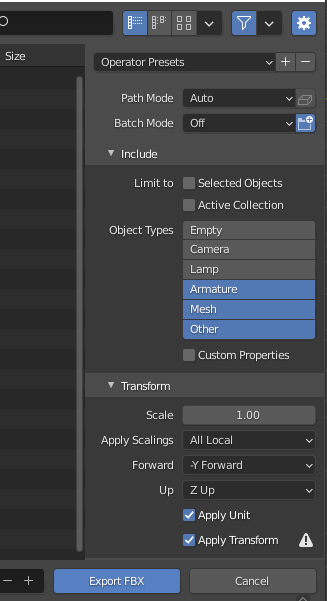
- Exporting as fbx – After setting your material shader method, exporting is very similar to Blender 2.7. We have provided a preview of settings when you want to include everything in your scene (Bones/Armatures, Mesh Surface, and Other). For selectively choosing what to export, it is recommended to view Blender’s documentation for a proper breakdown.
Blender 2.7X and Below
Inside Blender, in Edit Mode, click on the faces you want to texture, press CTRL+E and click on Mark Seam. This will separate the selected face for a specific texture. Marked edges will become red. If you don’t mark seams for the faces you want, they may overlap with the same texture (sometimes you will want this).
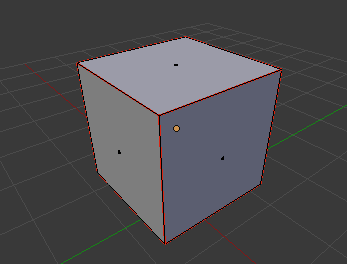
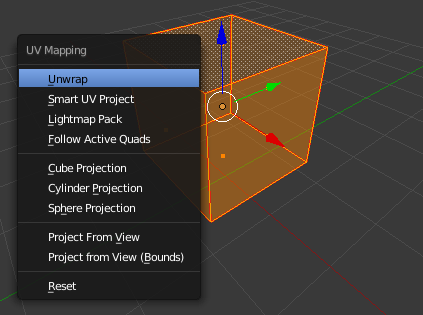
Now open a new view UV/Image Editor, so you can see both the 3D view and UV/Image Editor on your screen. In edit mode, press Z to see wireframe mode, press A to select the entire model, press U to bring up UV options and click on Unwrap. This will generate the faces you need to create textures. You can alternatively use Island Mode in UV Editor to organize your model’s faces accordingly. You can rotate, move them around and even scale them at will, this will not affect your model.
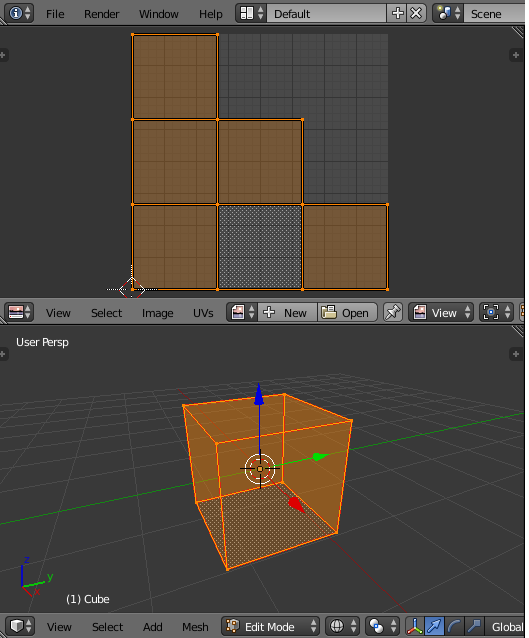
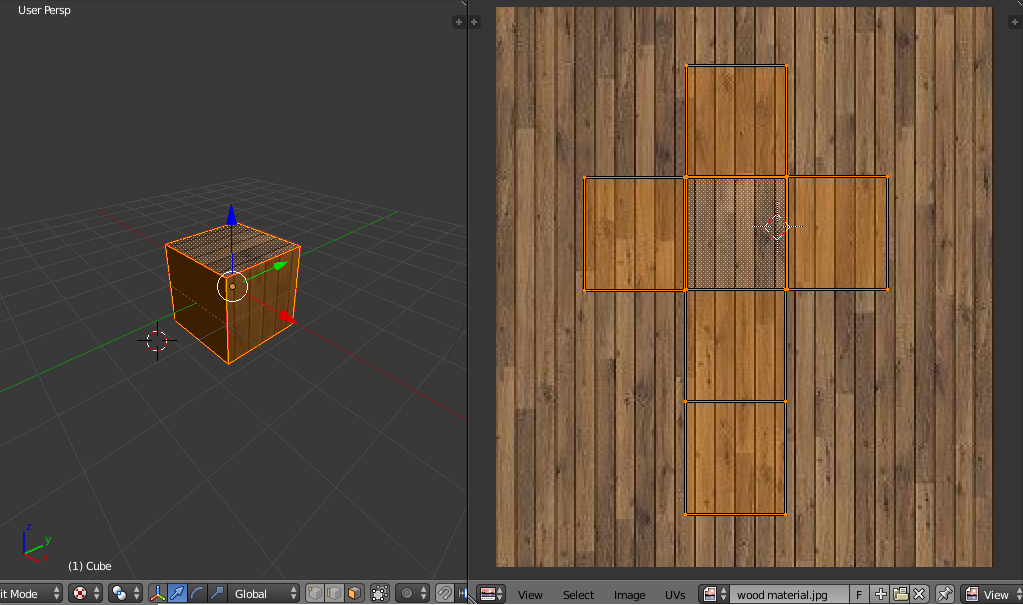
On the UV view, click on UVs menu and click on Export UV Layout. This will export a picture with the exact layout for your textures. You can right click on each face in the 3D view and it will highlight where it is in your UV mapping, in case you cannot identify by looking at the UV faces.
After you’ve created your texture, go back to Blender and load the image you made by clicking on Open Image on the UV/Image Editor view. Press ALT+Z to preview your model with the texture. Change to Object Mode.
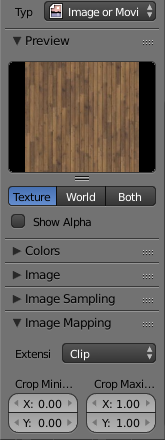
Now go on the Texture tab and press New to create a new Texture. Select Image/Movie type and load the texture image. Under Image Mapping options, set the Extension to Clip.
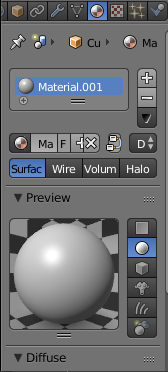
Then, go over Material tab and press New to create a new Material. Go back to the Texture tab and pick the texture you made from the texture selector. It should show a tick. This means your material is using this texture.
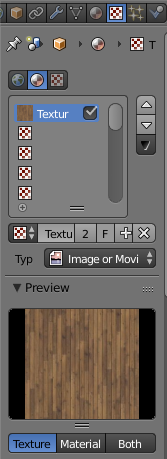
When exporting the model, it will use this material as a texture. You can tinker with material options to refine your texture and preview it by clicking on Material shading.
Animation Import and Features
001 supports bone based animations exported with .fbx and .dae (Collada) model formats. Keyed frames are exported along with your Skeleton Rig. 001 does not support direct implementation of .bvh or armature only motion files. There is no support in engine for vertex group retargetting, however, you can perform the retarget within your editor of choice and re-bind keyframes to produce the same result.
IK (Inverse Kinematics)
Inverse Kinematics are not supported in-engine, but, you can apply IK in your editor of choice and bake your animations to your timeline of your model.
Bones
001 Game Creator allows a maximum of 128 bones per model. Please note that 001 Game Creator will only allow a bone to affect up to 4 vertices. For optimal versatility, please set aside 4 bones for holding points.
Vertices Count
001 Game Creator allows for a maximum of 65535 vertices per 3D model. This allows for optimal performance in rendering a 3 Dimensional scene at any given time.
Polygon Count
Polygon count is a widely debated topic. For Tile-Set models (plants, desks, etc.) you should aim for as little polygons as possible, whereas Actor models (characters, vehicles, etc.) can use a little more. The recommended maximum polygon amounts for use in 001 Game Creator are listed below:
-
Tile-Set Models = <100 Tri Polys
-
Actor Models = 3000-4000 Tri Polys (PC)
-
Actor Models = 1000-1500 Tri Polys (Android)
Lights and Shadows
There are no set limits to the amount of lights per scene within 001, the maximum amount of rendered lighting is based on the performance of user systems. As such, 001 does not support dynamic shadows for 3D rendering or Raytracing.
Holding Points
Holding points for 3D models in 001 Game Creator are automatically calculated based off the location and rotation of bones in the model, providing that bone has the proper name so that 001 can recognize it and generate the holding points for you. 001 supports up to 4 holding points per model, and the bone name must correspond to the holding point it represents. The name for each holding point must be exactly:
-
“Holding Point 1”
-
“Holding Point 2”
-
“Holding Point 3”
-
“Holding Point 4”
Orientation
An object’s origin is the point at which rotation occurs and the point at which coordinates for the model are read. For example:
The origin for Actors should be directly centred at the base of an Actor.
The origin for Items should be where you intend the Item’s holding point to be to allow for direct snapping to holding point bones.
Holding Point Orientation
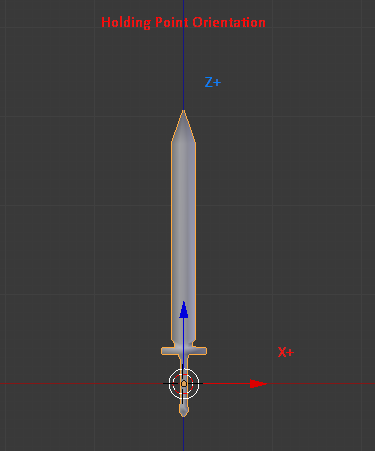
For best results it’s recommended you set up your Items to go along the Z+ axis. To ensure proper rotation for animations, the side you want for slashing or striking should be aligned to the X axis (see image below):
Holding Point 2
If you want a shield to display properly, the top of the shield should be oriented to the Z+ axis whilst also facing X+. Make sure the width is aligned along the Y axis (have a -90 degree turn to the shield to make things simpler).
Holding Point 3
Is set at the belt of the model’s left side and has the same orientation alignment to display as Holding Point 1 or Holding Point 2.
Holding Point 4
Is oriented at the model’s back and should have the same alignment for weapons. Shields, on the other hand, align width-wise along the X axis and the front should face Y+.
Tips and Troubleshooting
“When I import as an .obj or .fbx my model is gray and untextured!”
Check the names of your files and materials. If there are any spaces in the file name, it will not be recognized due to the way .obj and .fbx import library coding works. The easiest way to fix this is to edit your material name and file name to instead use hyphens in place of spaces. (Example: 001 Gladiator.obj should instead be named 001-Gladiator.obj. The same method would be used in your materials names, which can be edited in your 3D rendering software of choice.)
“Nothing is showing up!”
Check your scale. If your scale is too small or too big then nothing will show up.
“Parts of my mesh are invisible in engine after adding bones!”
Check your scale for your armature, make sure to apply or clear any scale modifiers set to any bones. Bake animations to your armature. Check your armature parenting and weight values. Like mentioned above, always apply any scale modifiers to your mesh, if scale ratio of the mesh is different compared to the armature some unpredictable results may occur on export.
“I know animation is supported but how do I bring it to 001 Game Creator?”
To export animations it is best to have an armature for your 3D model. To export the armature and all children of said armature, you highlight your armature, hit export in Blender under file, then choose which format to export to. In that screen you scroll down and check the children and armatures boxes, also remember to check the boxes for materials and textures.
“I have multiple keyframe timelines in my animation, will 001 Game Creator import it properly?”
No. What you will have to do is bake your animation to a single timeline. To do this in blender open Pose Mode, Press A to select all of your bones, navigate to the Pose option in the bottom left and then go up to the Animation option. This should pull out the Bake Action/Animation feature. Select it and follow the options after.
“I can add 3D models as Sprites but can’t add them as Tile-Sets?”
To import a model to a tile make sure your Tile-Set is set to “Lower Object”, then right click it, select “Replace”, click on the drop down menu in the bottom-right and select “3D Models”.
“Color/Diffuse textures aren’t showing up!”
Make sure the assets are in the same folder.
“How do I fix vertical/horizontal lines from appearing on my floor/wall tiles?”
In the Tile-Sets window, click on the “Edit Compression” button to bring up the Graphic Platform Compression window and then select the “Padding” option.
“My models look like plastic, how do I fix that?”
This deals directly with your Specularity settings and color. Choosing a darker color (like grey) and reducing the specularity intensity will adequately reduce the “plastic sheen” produced with default export settings. Keep in mind, setting your specularity to 0 is not a valid value, 0 values default to 0.1 within 001. We also have an extremely useful link in our Third Party Resources page in the “Tutorials” section, with a large atlas of materials and settings for 3D models to replicate real world textures.
“My normals are blocky in 001, what is wrong?”
On your model you need to enable Smooth Shading. Simple mesh shading can also be used for flat objects or sharp corners, but ideally you want the implemented normal mapping to define the visual contours of your normals.
“I have see-through “patches” in my model within the engine”
This is a common issue and can easily be fixed. Within your renderer/editor of choice, your face normals must be recalculated or flipped. You can in 001 enable select the “Render Both Sides (3D)” option, but this is only a band-aid and does not fix your issue.
“Does 001 support Level of Detail and is it Implemented?”
Yes 001 can support level of detail(LoD), but this system is not natively implemented into the 001 feature set. A system can be created within 001 to accomplish this. Using distance checks from camera centre (or based on your controlled actor position) you can replace models using Change Body/Clothing events in a When trigger. PLEASE NOTE: This can be a resource heavy feature based on the amount of actors and objects currently rendered. Additional scripting may be required to perform this with 3D models contained in tiles.
“My 3D model is disappearing in the map editor while editing”
This can happen with very large models, especially when zoomed out. To fix this issue, you need to create a random Sprite that has a size of 2048×2048 (Or 4096×4096 for huge models) which should resolve this issue.

